Introduction
The goal of this project was to build a compact and functional home network while gaining hands-on experience in configuring and managing network infrastructure. Throughout this process, I enhanced my understanding of network topology, segmentation and hardware integration.
Objectives
- Gain practical experience in deploying and managing network infrastructure.
- Improve security and efficiency with Pi-hole + Unbound DNS for ad and tracker blocking.
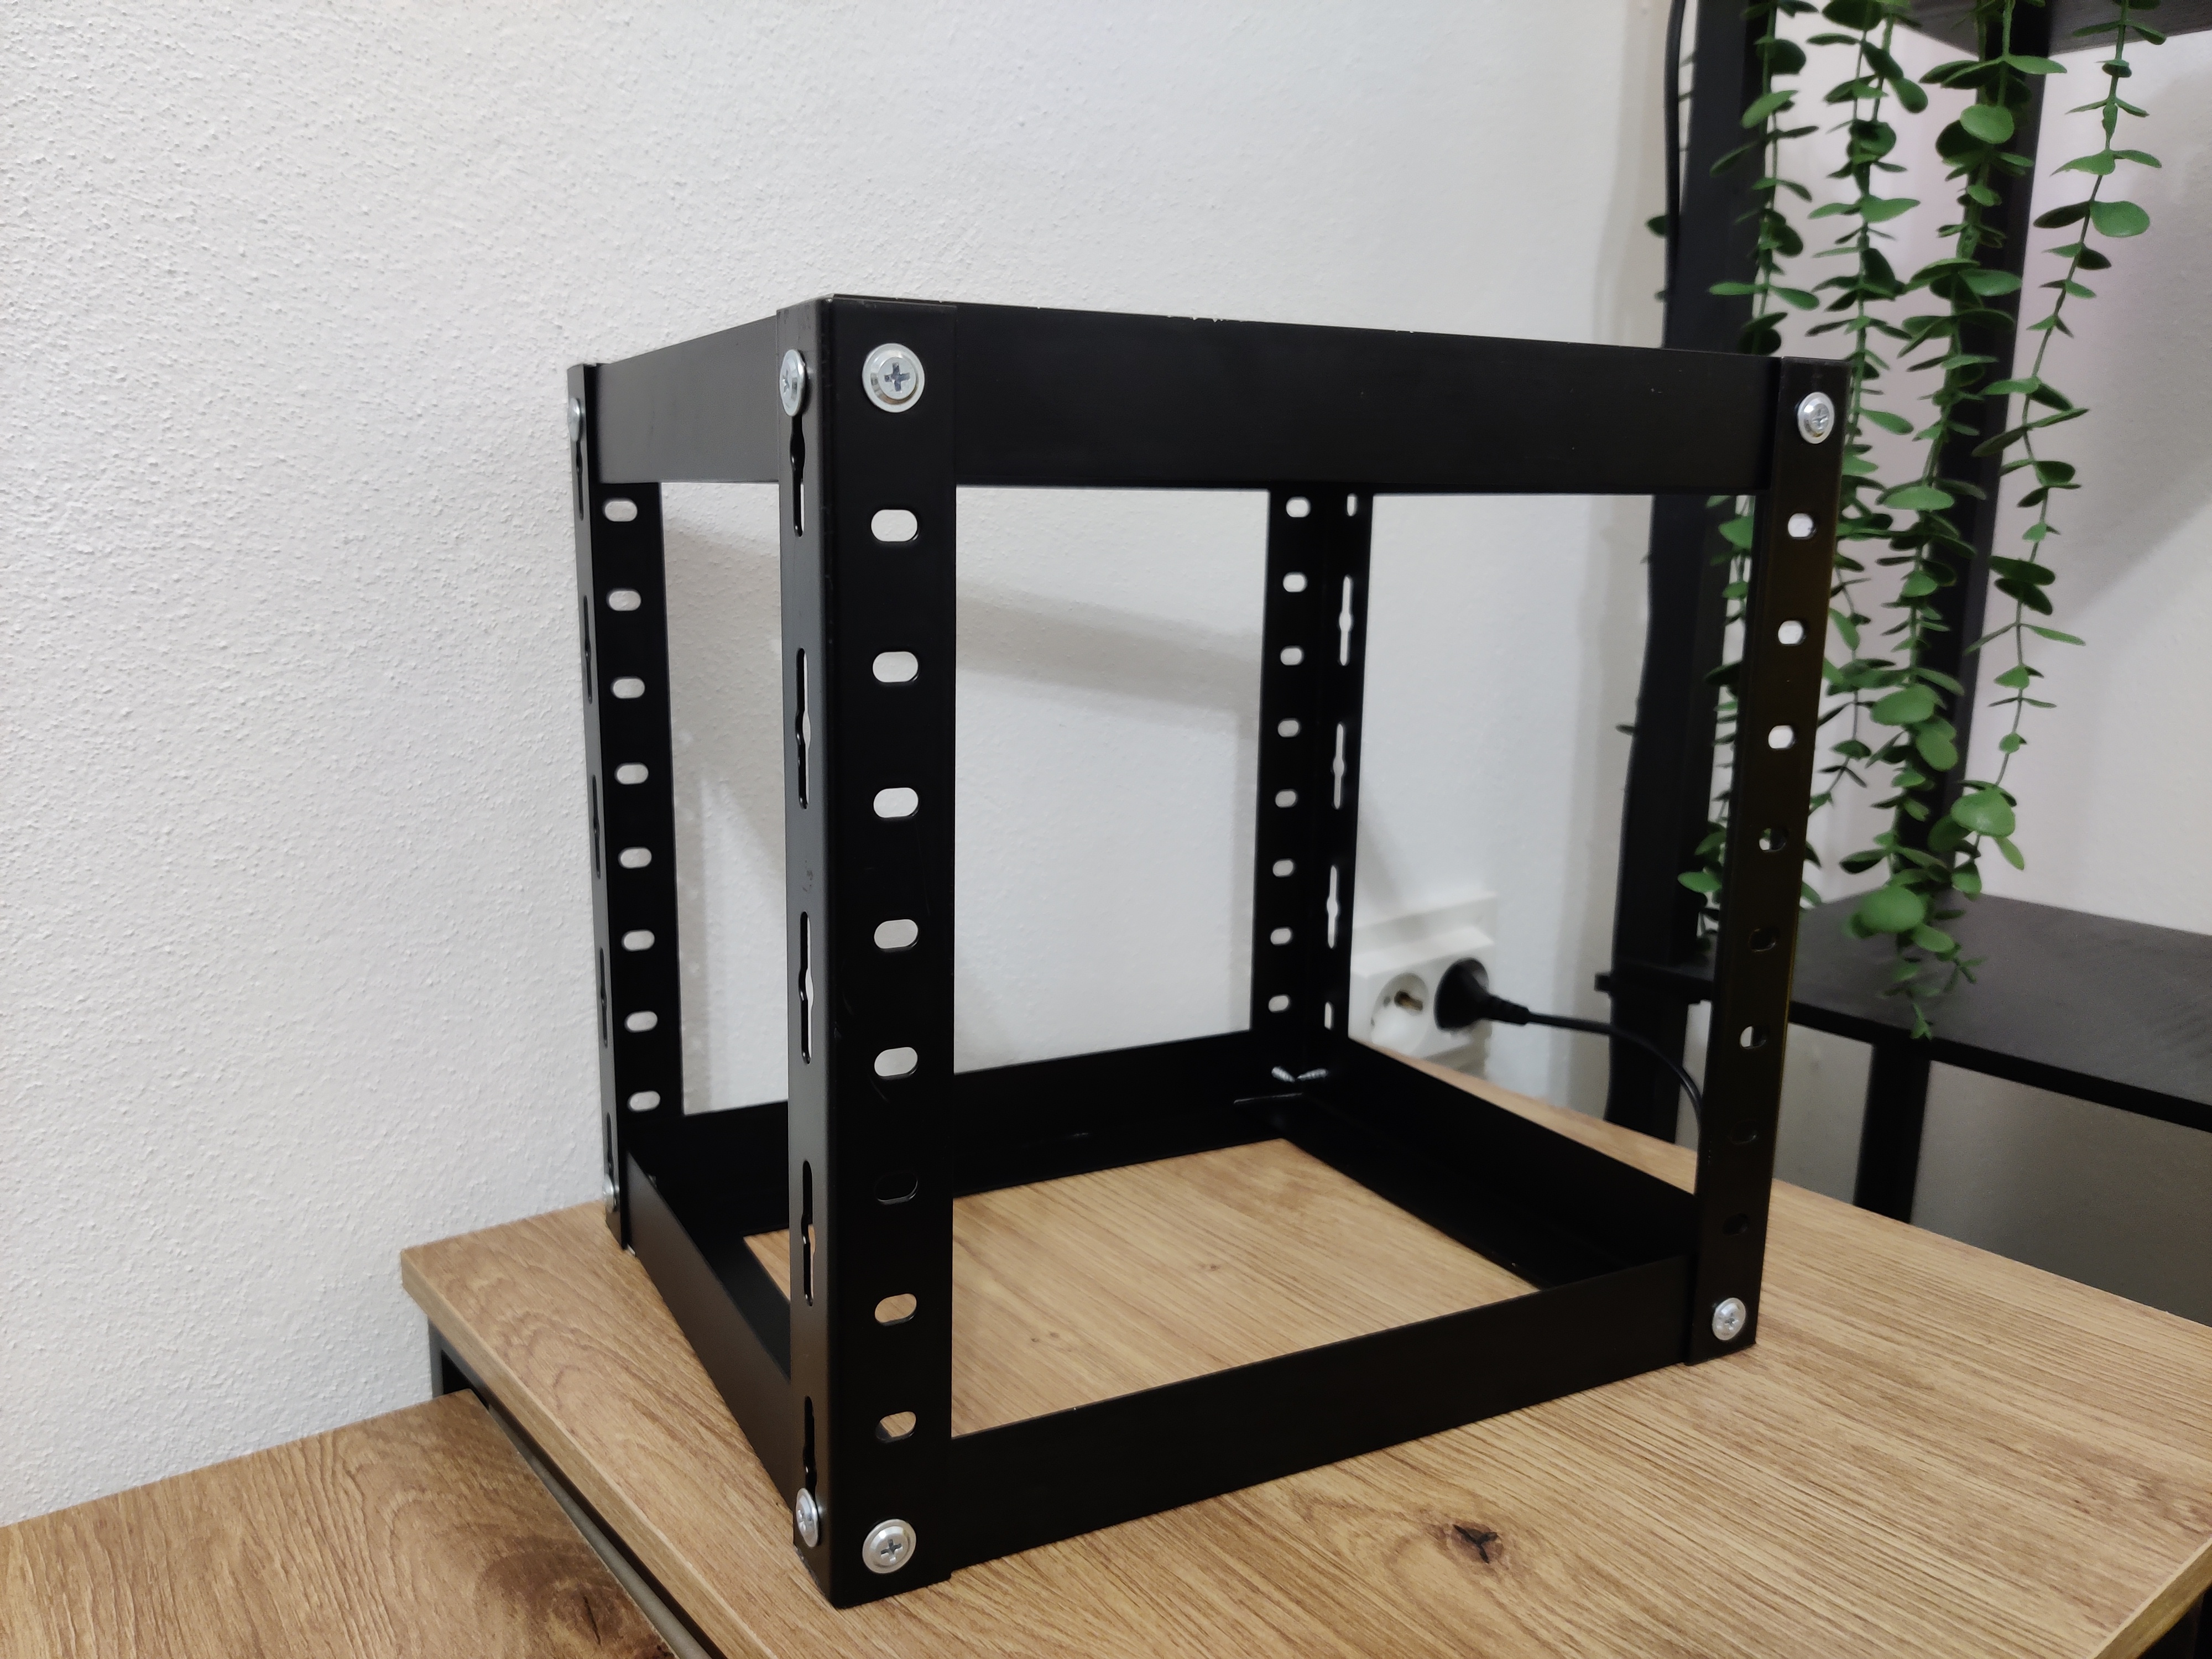
- Design and assemble a custom space-efficient networking rack using 3D-printed parts.
Hardware Overview
| Component | Description |
|---|---|
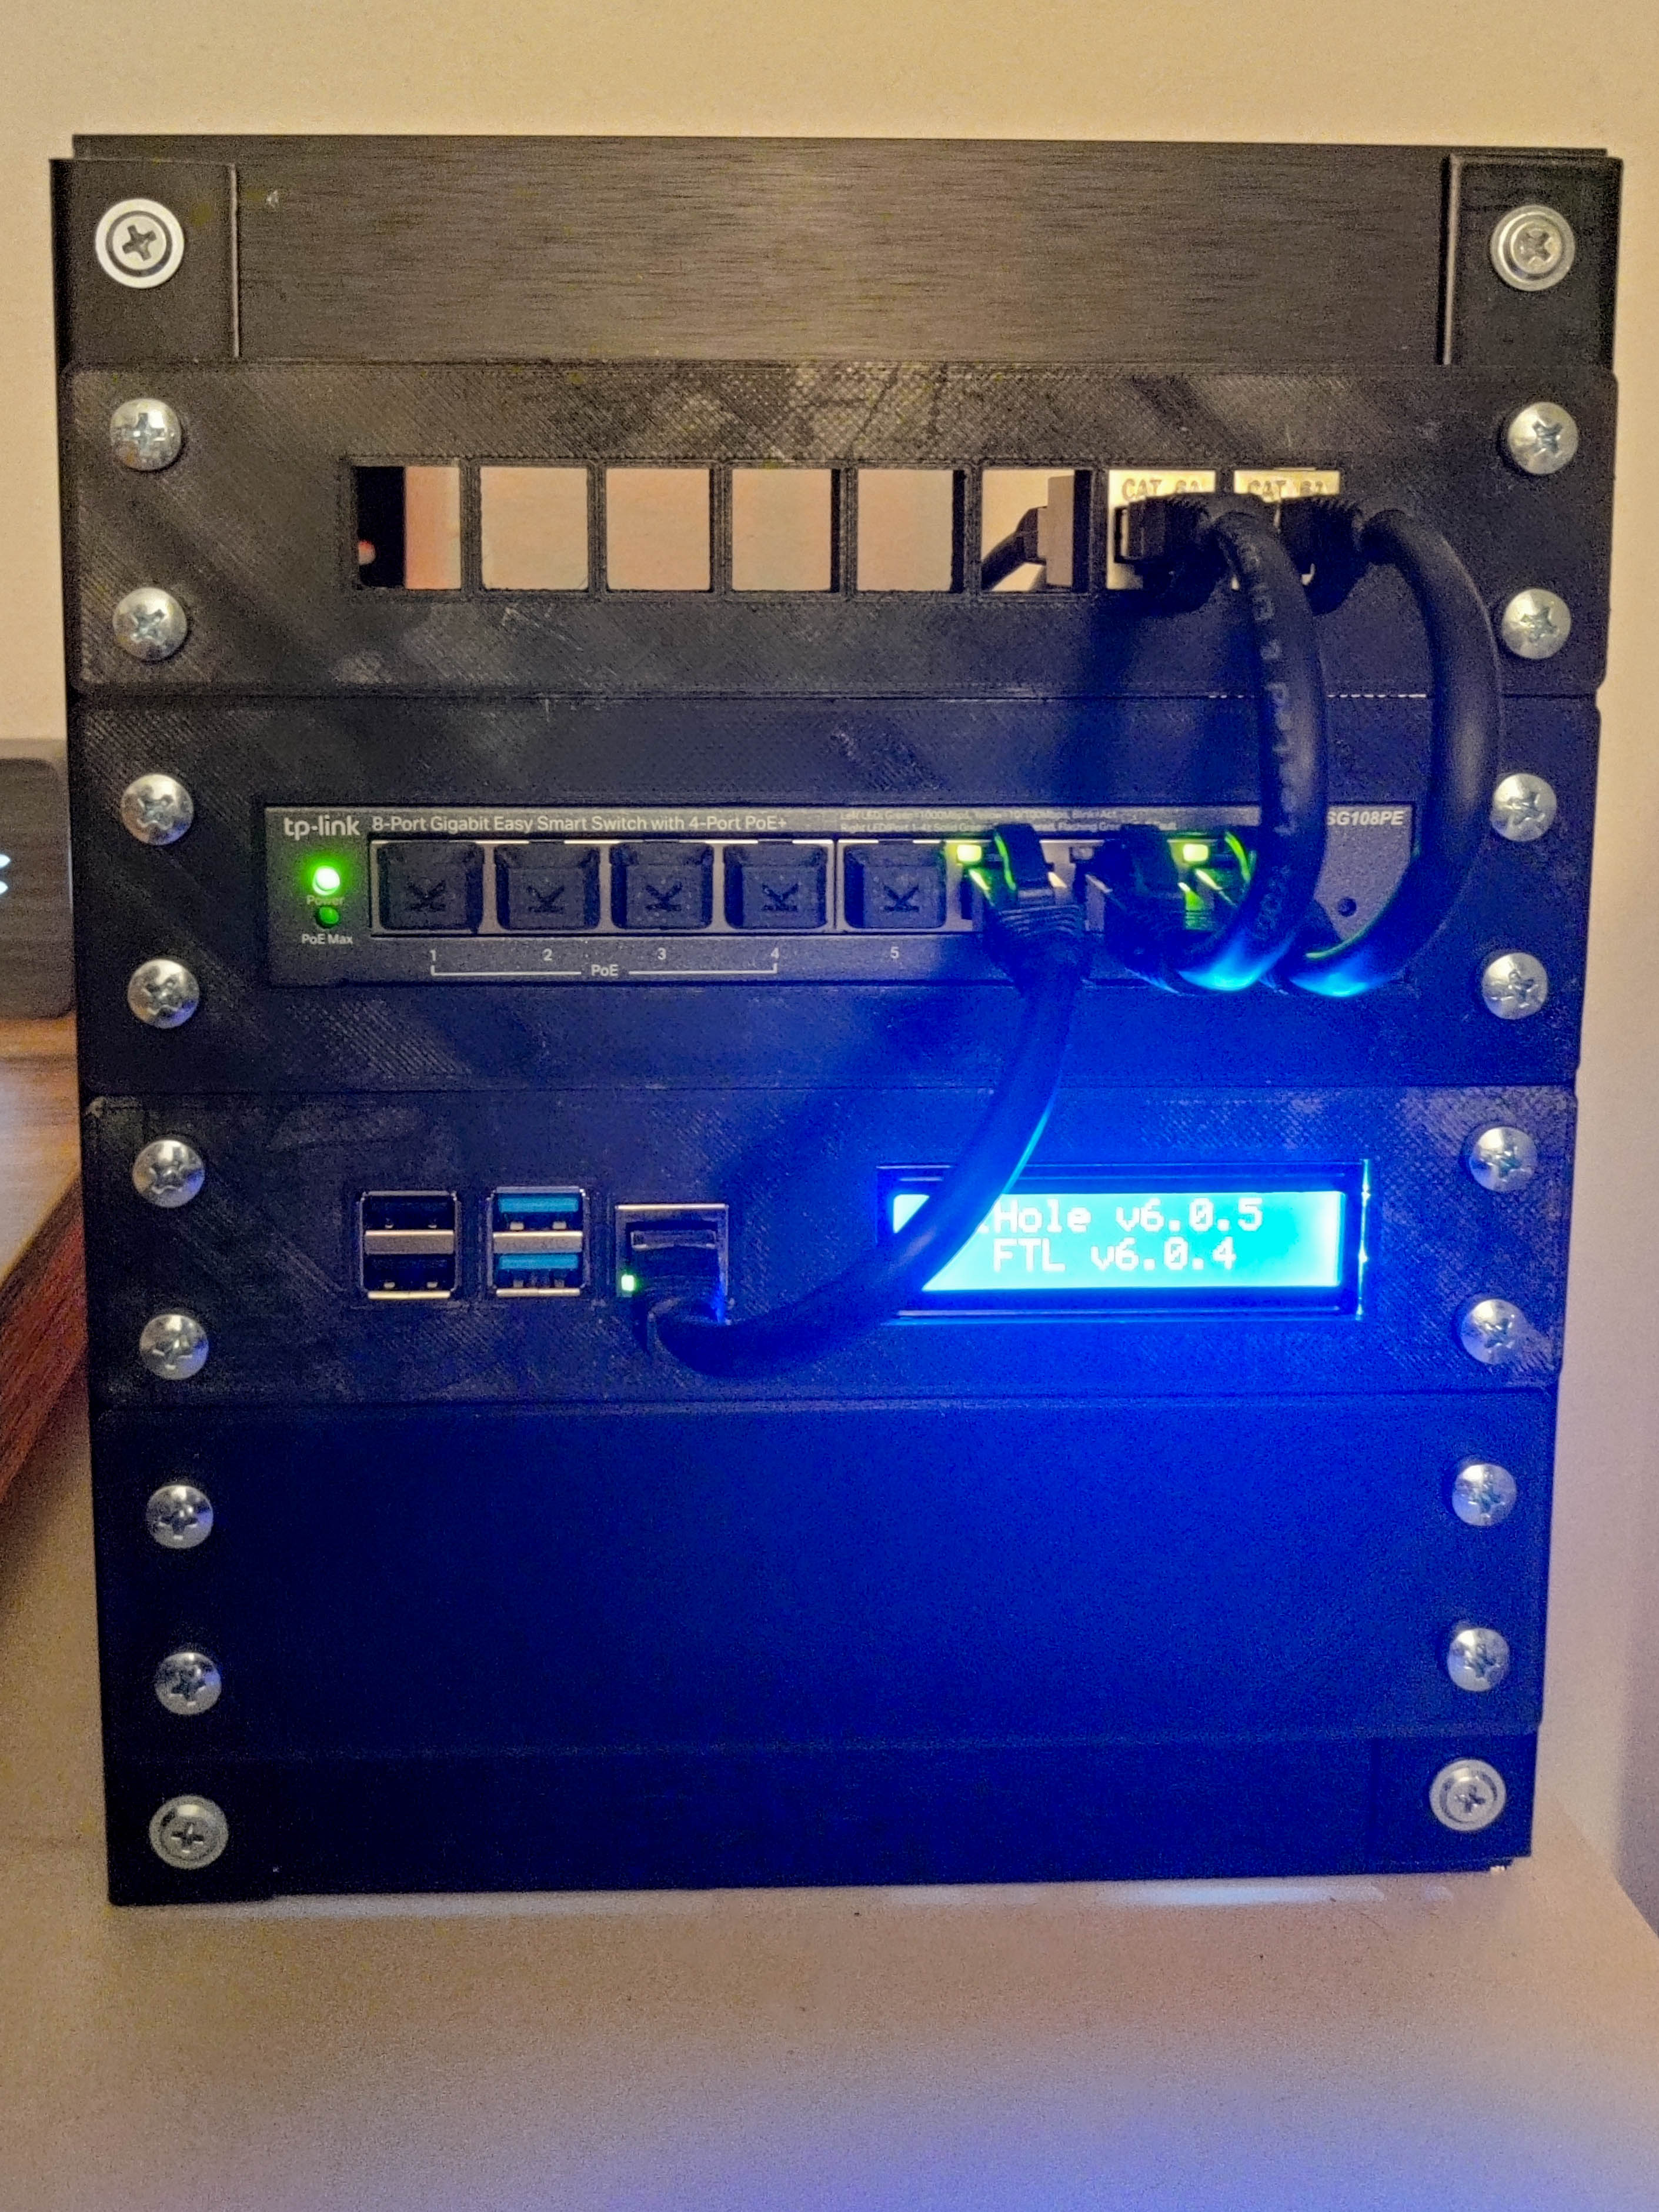
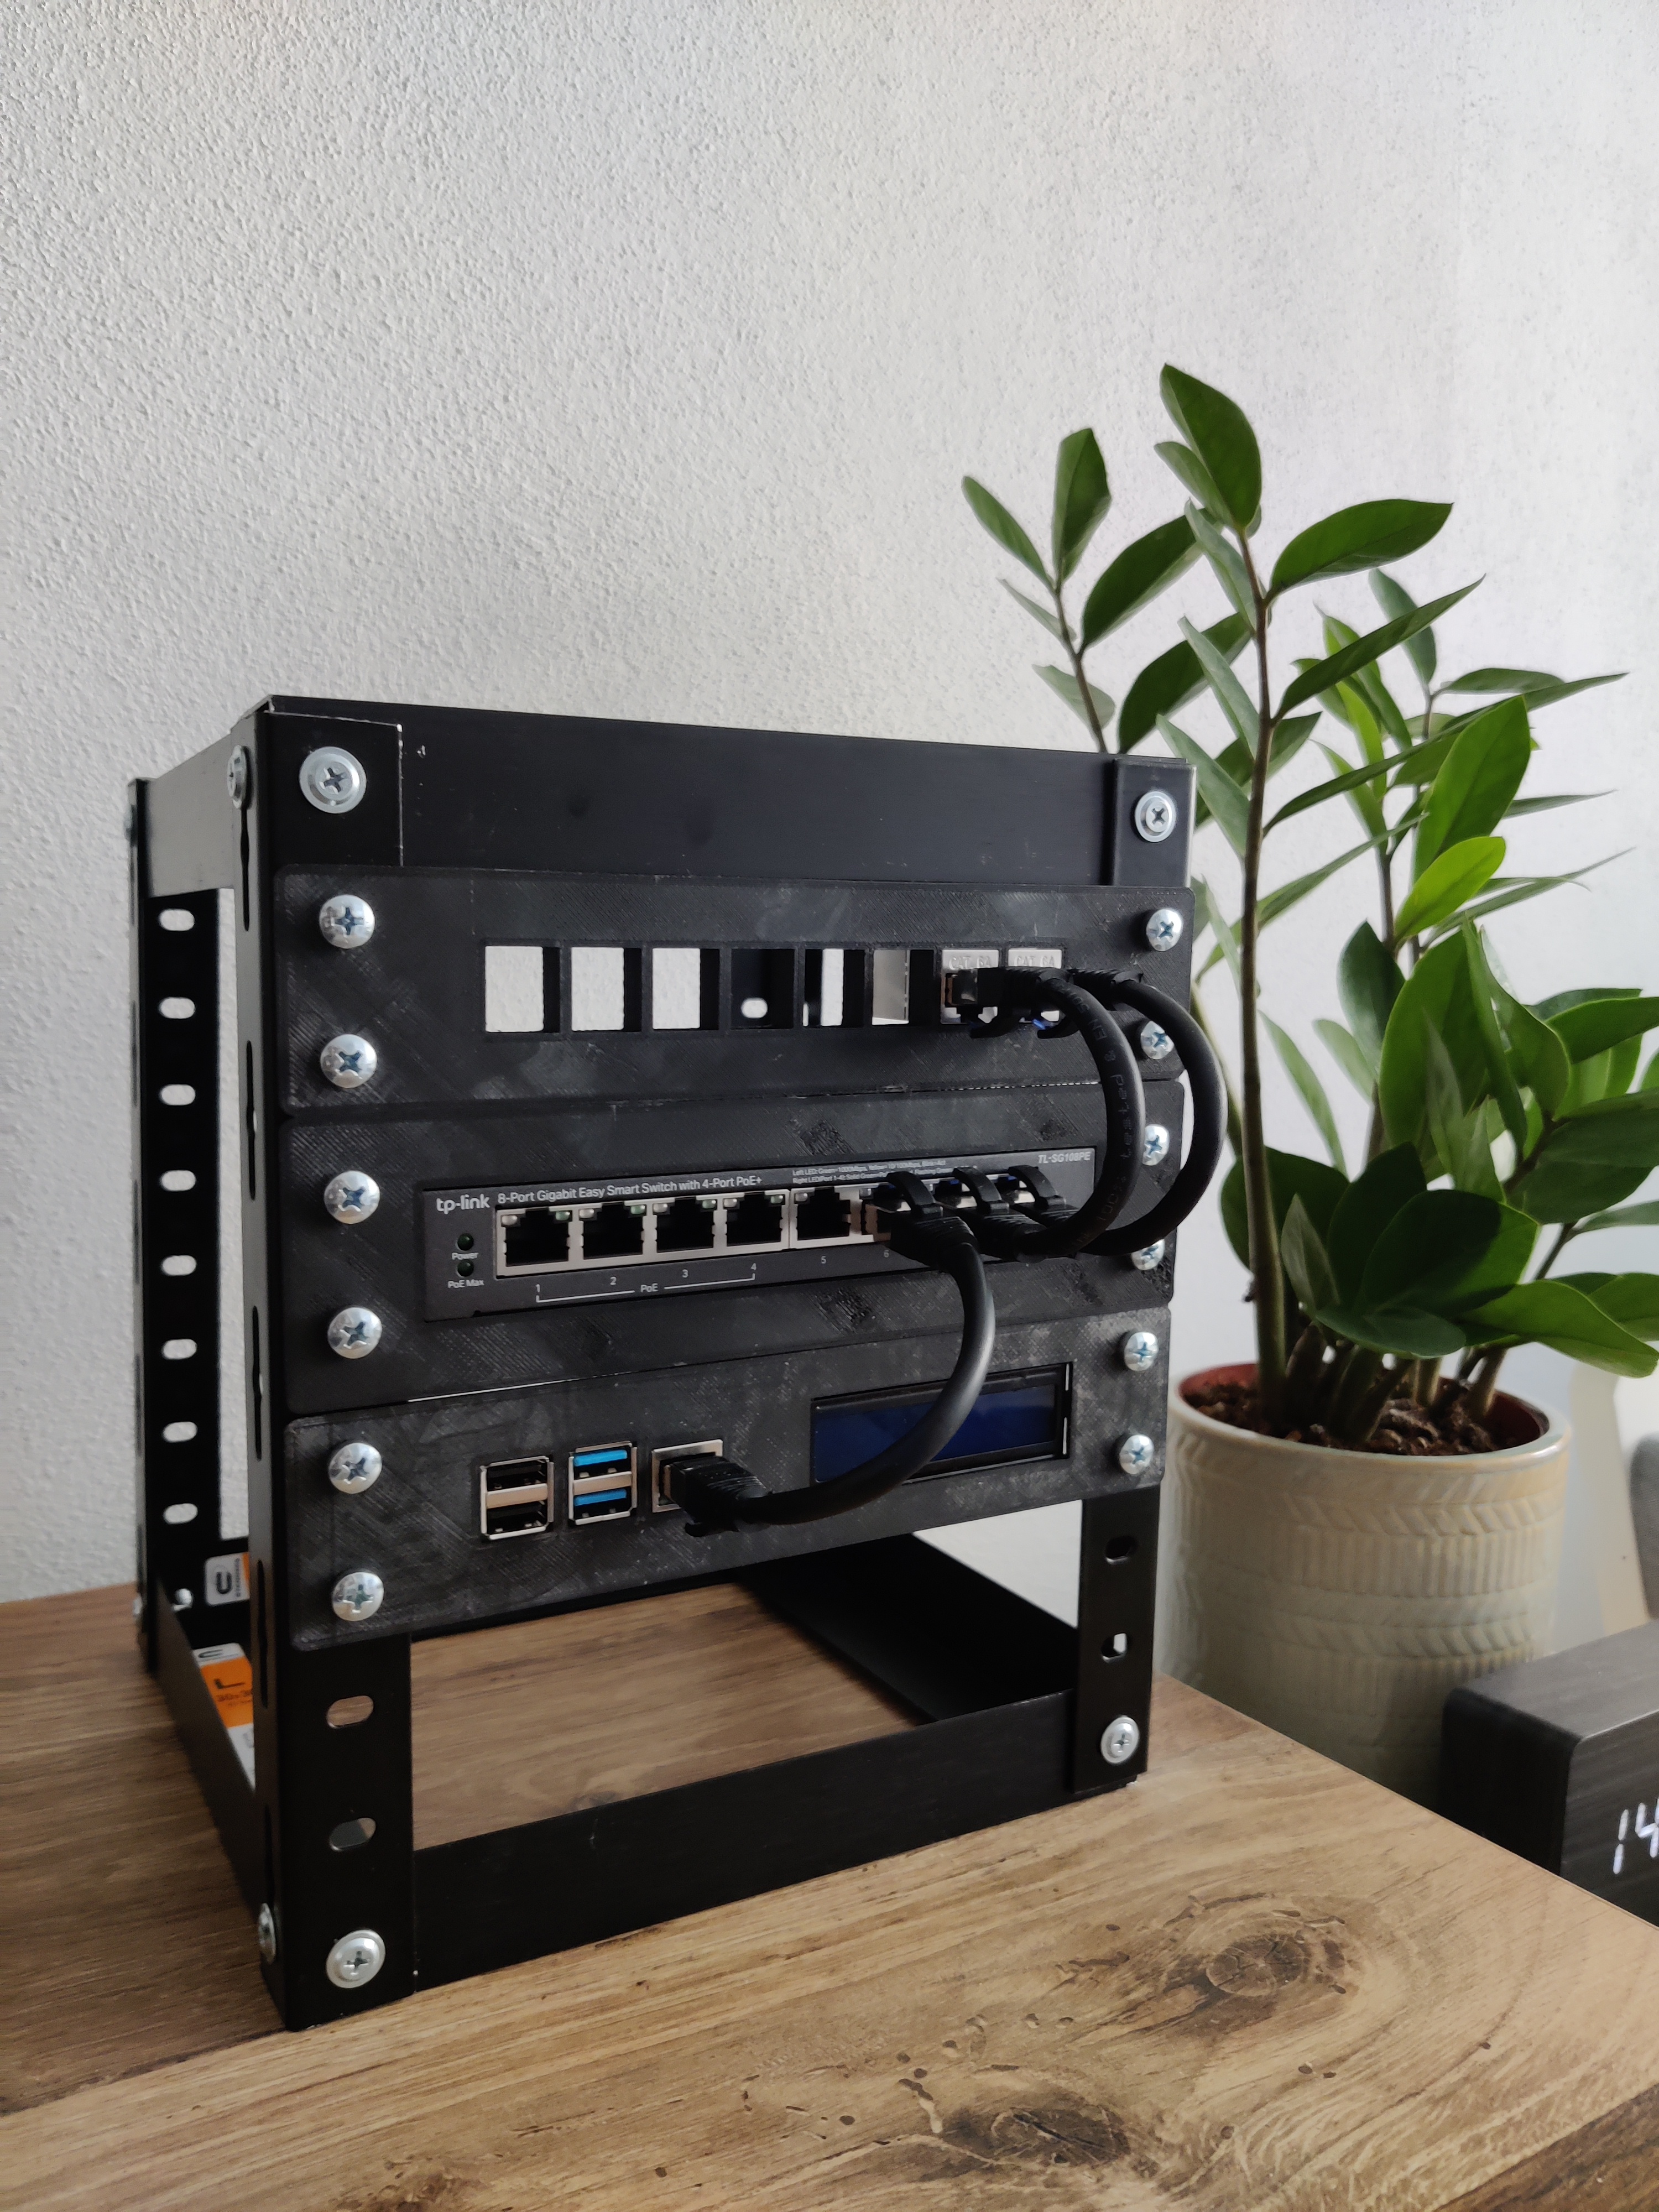
| Patch Panel | Improves cable management and provides structured wiring |
| Patch Coupler | 2 x Keystone RJ45 CAT6A shielded couplers |
| TP-Link TL-SG108PE | Managed 8-port Gigabit switch with PoE & VLAN support |
| Raspberry Pi 4 (8GB) | Runs Pi-hole (DNS filtering) + Unbound (recursive DNS) |
| 16x2 LCD Display | Displays real-time Pi-hole stats (DNS queries, uptime, etc.) |
| 3D Printed Mounts | Custom-designed brackets for component mounting |
| Metal Frame | Provides structural support for the rack |
| CAT6A SFTP Cables | Various lengths (6-inch, 16-ft, and 82-ft) |
Raspberry Pi Setup
- OS: Raspberry Pi OS
- Static IP: Configure a static IP for the Raspberry Pi.
- Pi-hole installation: Install Pi-hole using their one-step script.
- Access the dashboard at:
http://<pi-ip-address>/admin - Change the password with:
pihole -a -p -new_password - Access the dashboard at:
- Recursive DNS with Unbound: Follow the official Pi-hole + Unbound guide to configure Unbound as the upstream resolver. This removes reliance on external DNS providers and enhances privacy.
- LCD Statistics Display: Attach a 16x2 LCD display to monitor Pi-hole stats in real-time. Use this script.
- To run it persistently in the background:
screen -S pihole_lcd- The script will start. Press Ctrl+A, then D do detach from the session.
Network Segmentation
Since my router lacks VLAN support, segmentation was implemented on the managed switch:
- VLAN 10 (Main): Trusted devices (PCs, phones, TV)
- VLAN 20 (IoT/Media): Isolated devices (smart devices, cameras)
- VLAN 30 (Guests): Guest network for untrusted devices
This setup improves security by isolating IoT and guest traffic, preventing lateral movement in case of compromise.
Enhancements Implemented
- IoT Isolation → Limits exposure from less secure devices.
- DNS-Level Protection → Pi-hole blocks ads, trackers and malicious domains.
- Firewall Rules → Additional filtering.
Challenges & Solutions
| Challenge | Solution |
|---|---|
| Router lacks VLAN support | Used switch-only VLAN for segmentation |
| Pi-hole installation issues | Pi-hole prompted an error when installing, and it needed a fresh OS install on a new SD card |
| LCD script not persisting | Used screen to keep the display script running in the background |
Future Improvements
- Upgrade to a VLAN capable router.
- Add a UPS for power stability.
- Implement network monitoring.
- Add PoE powered security cameras.
- Add a mini-PC to host VMs and containers for homelab experiments.
Results and Conclusion
- Performance: Faster browsing and ad-free experience.
- Security: DNS-level filtering blocks trackers and malicious domains.
- Learning outcomes: Gained hands-on experience with:
- VLAN configuration and network segmentation
- Pi-hole + Unbound setup for secure DNS
- CAD design and 3D printing for rack components
This project successfully combined practical networking, DIY, and security-focused design. It serves as a strong foundation for future homelab and enterprise-grade network experiments.